VRE Lab
Description
This VRE Lab workspace hosts a JupyterLab environment that provides Jupyter notebooks alongside a number of useful applications accessible through the browser. You can also access RStudio via the browser by selecting it when creating your workspace. This catalog item can easily be extended with additional applications to suit your research needs.
VRE Lab workspace is also available with a Desktop interface. Select Ubuntu Desktop as the flavor when creating your workspace and you can access it from the JupyterLab environment.
The Desktop option is particularly useful for GUI applications, 3D visualization tasks, and when combined with GPU workspaces (VRE Lab GPU catalog item), provides GPU-accelerated rendering for 3D analysis and extensive data processing from the desktop environment.
The workspace includes Python environment management with uv.
You can automatically install environments and dependencies for Python, R, Julia, and Conda using the Custom Packages Optional Component provided in this workspace.
If you wish to customise this workspace further by installing system packages or need additional help, you can contact us
This workspace can be created with or without nvidia CUDA GPU drivers pre-installed.
To create with GPU pre-installed select VRE lab GPU when creating the workspace,
GPU workspaces consume more credits. See the cost calculator for an estimate.
A GPU may speed up your code if the (python) libraries that you use are designed to take advantage of GPU acceleration (e.g. Pytorch, Tensorflow, LLMs). Only choose GPU workspaces if you know that this is the case. If you are not sure, contact us.
Creation
Create a storage volume
If desired, first create a storage volume before creating the workspace.
See the Getting started page for more info about how and why to create a storage volume.
Create a workspace
In the Research Cloud portal click the ‘Create a new workspace’ button and follow the steps in the wizzard.
See the workspace creation manual page for more guidance.
Most Utrecht University users will already have access to this catalog item. If you cannot find this catalog item when creating a workspace:
- You need to request access to the Utrecht University Catalog Item Collection.
- Follow these steps to request access.
- Once approved, you’ll be able to create the workspaces.
Optional Components
VRE Lab allows you to customise your workspace by selecting additional optional components during workspace creation. This lets you pre-install tools for your research needs.
During workspace creation, you’ll see an Optional components section where you can check the components you want to install.
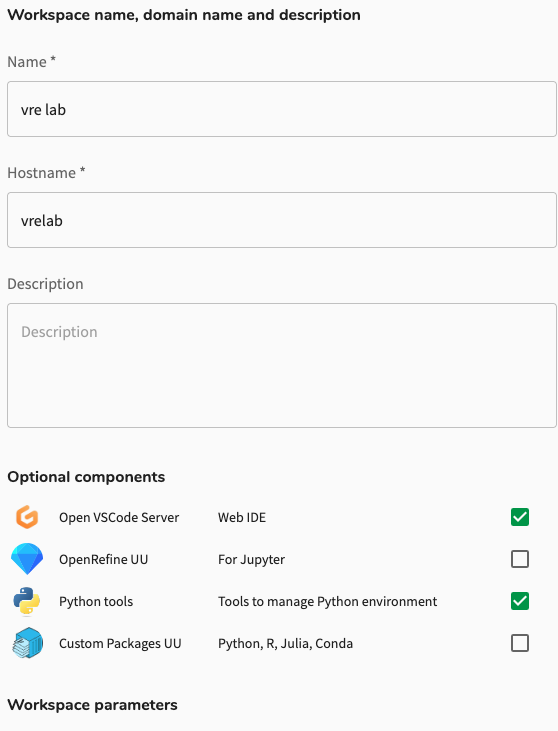
Available components:
- Open VSCode Server: Web-based integrated development environment (IDE) for coding directly in your browser.
- OpenRefine UU: Data cleaning and transformation tool accessible from JupyterLab.
- Python tools: Additional tools for managing Python environments (includes
uv,poetry, andconda). - Custom Packages UU: Automatically install dependencies for Python, R, Julia, or Conda projects from Git repositories, Zenodo, Dataverse, or DOI links.
- RStudioUU: Access an RStudio IDE with a R environment in the same workspace.
Pre-installing Python, R and Julia packages during workspace creation
Setup
- Check “Custom Packages UU” in Optional Components when creating your workspace
- In the “Projects to pre-install” field, enter your project identifiers as URLs or DOIs (pointing to repositories) separated by commas
- Wait for workspace to build (may take longer with many dependencies)
- Projects are cloned to
~/local-share/projects/and environments are created automatically based on the dependency files
The project you wish to install must contain valid dependency files (environment.yml, requirements.txt, pyproject.toml, etc.) for automatic installation to work.
After workspace creation, select the Jupyter kernel for your project, or activate the environment in the terminal via:
conda activate /usr/local/uu/env/conda/{project-name}source /usr/local/uu/env/python/{project-name}/bin/activateFor detailed instructions on using and modifying these environments, see the detailed Custom Packages Manual.
Simply check the boxes for the components you need, then continue with workspace creation. You can always install additional software later using sudo rights from the terminal.
Access
Accessing the Workspace
Accessing the Workspace via the command line (SSH)
If you do not have an ssh key pair set up, you will need to generate one and add the public key to your SURF Research Cloud account. Follow the instructions to set up SSH access..
- Open the ‘Terminal’ application.
- In your terminal application type:
ssh <ResearchCloud username>@<workspace ip address>
The ResearchCloud username is given on the “Profile”-Tab of the ResearchCloud portal page. The ip-address of the workspace is displayed on the (extendable) display tile of the workspace in the main (“Dashboard”) tab.
Make sure you have installed an application that allows you to login using SSH: Git Bash (recommended), alternatively MobaXTerm
Open your ‘Terminal’ application (e.g. Git Bash).
In your terminal application type:
ssh <ResearchCloud username>@<workspace ip address>
The ResearchCloud username is given on the “Profile”-Tab of the ResearchCloud portal page. The ip-address of the workspace is displayed on the (extendable) display tile of the workspace in the main (“Dashboard”) tab.
If you just submitted a new public key or when the workspace is new, you might have to wait for a few minutes for this to work.
Usage
After logging in, you’ll have access to the JupyterLab interface which includes:
- Jupyter notebooks for interactive coding
- Additional browser-based applications
- Integrated terminal access
- Desktop interface (if you selected the Ubuntu Desktop flavor) that opens in a new browser tab
Data transfer options
See our data transfer manuals.
Use this table to find the appropriate data transfer method for your situation:
| Data Source | Recommended Tool | Best For | Skill Level |
|---|---|---|---|
| Your PC/laptop | JupyterLab Upload button | Small files, quick uploads | Beginner (GUI) |
| Yoda/iRODS | iBridges | All file sizes, CLI access | Beginner to Intermediate |
| Yoda/iRODS | iCommands | Large datasets, transfer automation, CLI | Intermediate (CLI) |
| SURFdrive, ResearchDrive | rclone | Cloud storage sync, scheduled transfers | Intermediate (CLI) |
| Your PC/laptop | scp | Direct one-time transfers | Intermediate (CLI) |
| Your PC/laptop | rsync | Sync or repeated transfers | Intermediate (CLI) |
| Your PC/laptop (Windows only) | MobaXterm | Graphical SSH/SFTP client | Intermediate |
| Your PC/laptop | Cyberduck | Graphical SFTP client | Intermediate |
| GitHub/GitLab | git clone | Code repositories, version control | Intermediate (CLI) |
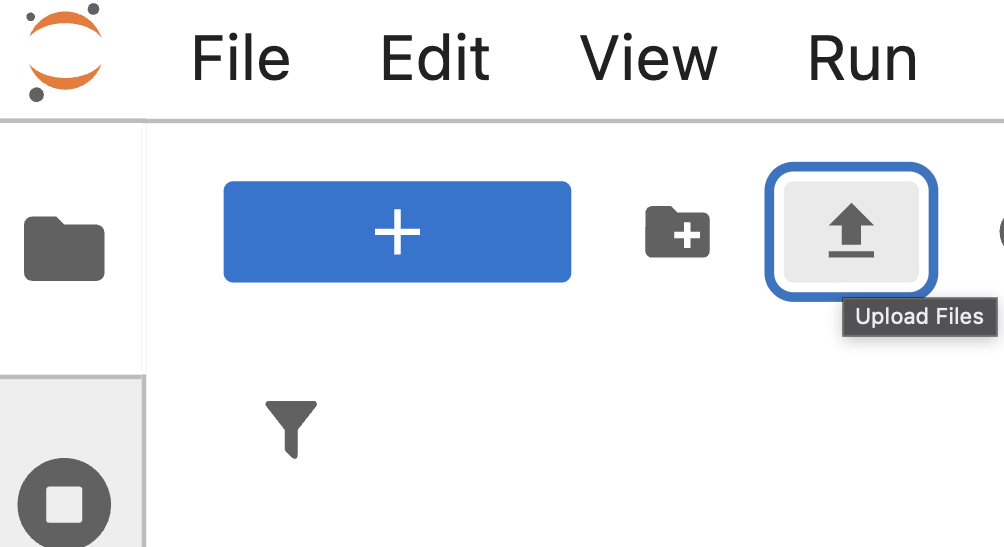
You can upload data directly to the workspace using the Upload Files button in the JupyterLab interface.
OneDrive is currently not directly supported with rclone for UU accounts. To transfer files from OneDrive:
- Download (preferably compress/zip) files from OneDrive to your local PC
- Transfer from your PC to the workspace using one of the methods above
For larger data transfers, the recommended iBridges client for Yoda and iRODS is preinstalled.
Sudo rights
Sudo rights can be obtained by adding collaboration members to the src_co_admin group in SRAM.
Members with sudo rights can install system-level packages and perform administrative tasks on the workspace.
Tips
This workspace includes uv for Python environment management. See the Python environment manual for best practices and getting started.
Workspace security
Please take a moment to read the security recommendations for VREs.